Showing posts with label libvirt. Show all posts

Sunday, August 6, 2017

Creating OpenBSD guest with libvirt/bhyve

I've been asked a couple of times how to setup OpenBSD guest with libvirt/bhyve. It's fairly straight-forward, but minimal libvirt version required for that is 3.5.0 because it's the first version that allows to specify vgaconf settings.

First, download the installation image: https://ftp.openbsd.org/pub/OpenBSD/6.1/amd64/install61.fs and create a disk image:

truncate -s 2G openbsd61.raw

Create an initial XML (pay attention to the vgaconf='off' bit):

Now with virsh do:

virsh # define /path/to/openbsd61.xml
Domain openbsd61 defined from /path/to/openbsd61.xml

virsh # start openbsd61
Domain openbsd61 started

virsh # vncdisplay openbsd61                                                                                                                                                                                       
127.0.0.1:0                                                                                                                                                                                                        

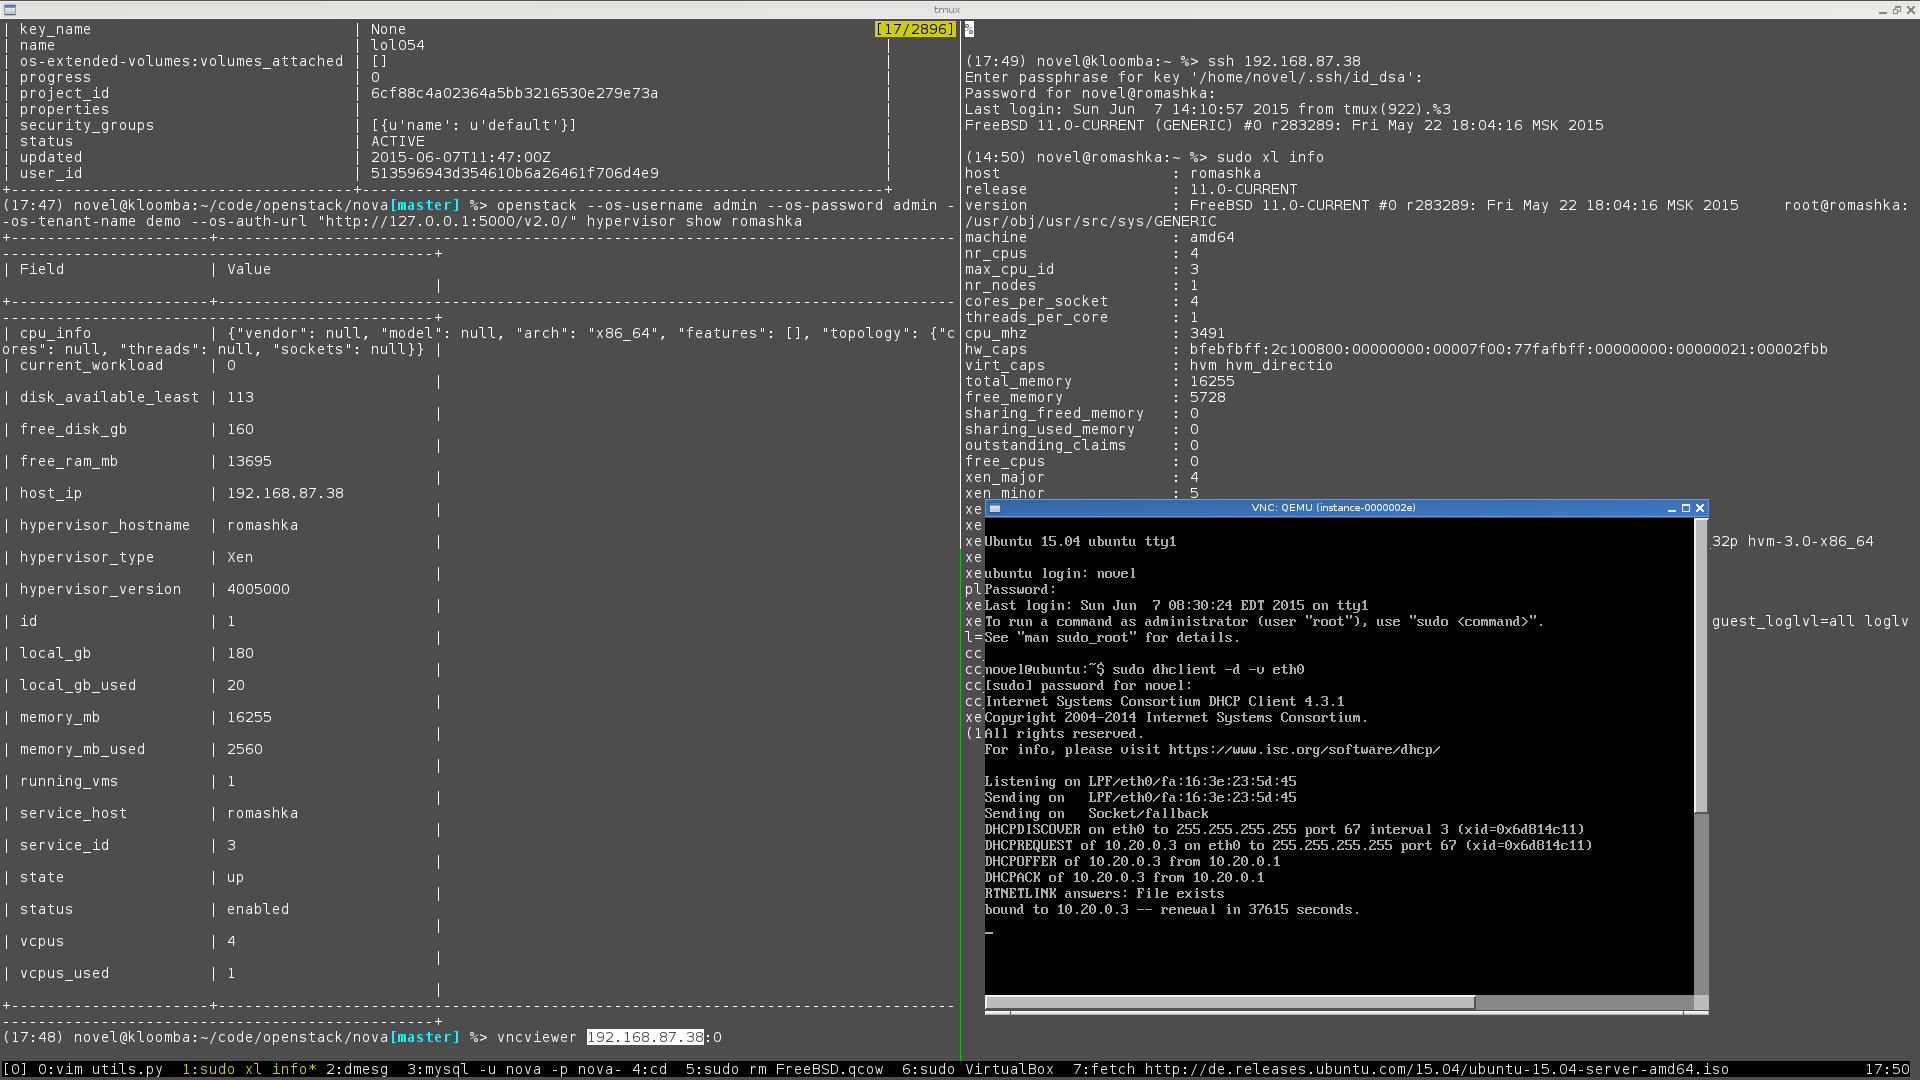
Using VNC client connect to the guest at the specified port:

vncviewer :0

This gives a boot loader prompt. For some reason, it doesn't set root device properly, so I have to do:

set device hd1a
boot

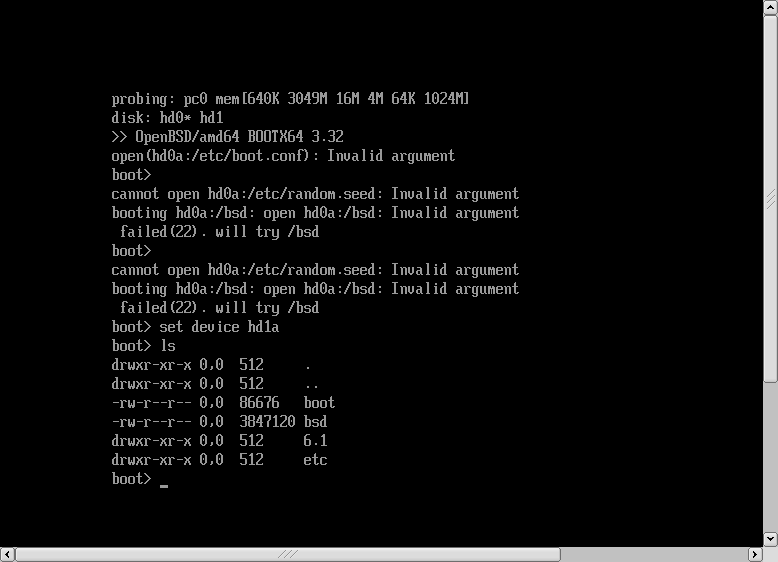
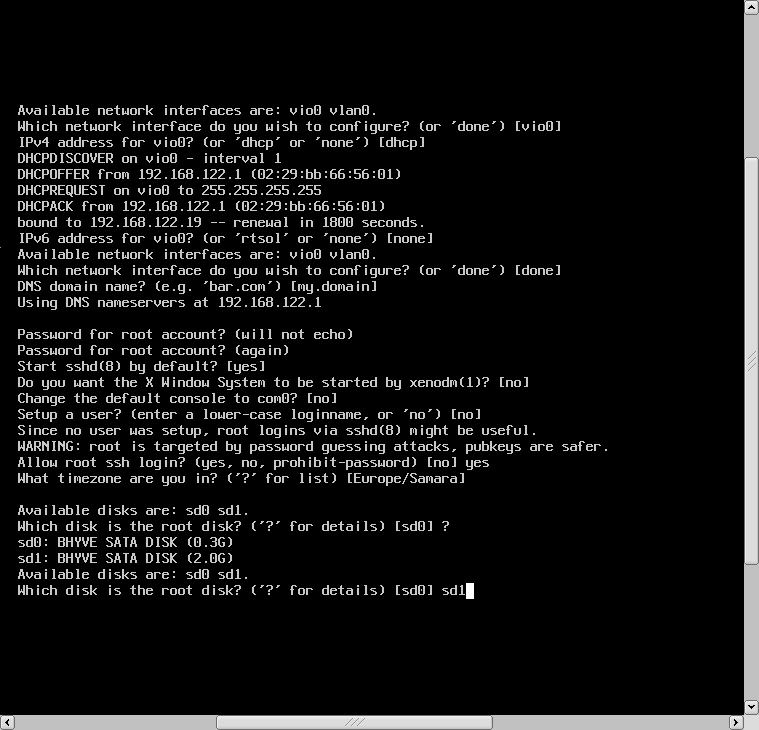
Then there'll be a number of installer questions (where I usually accept defaults) until it asks what disk should be used as a root device. It's important to check this carefully and choose the right one (you can find it by its size for example), otherwise it might just try to override the install image.

When the installation finishes, shutdown the guest, go back to virsh and edit the domain xml:

virsh # edit openbsd61

And remove the disk block corresponding to install61.fs. And then start domain again:

virsh # start openbsd61   
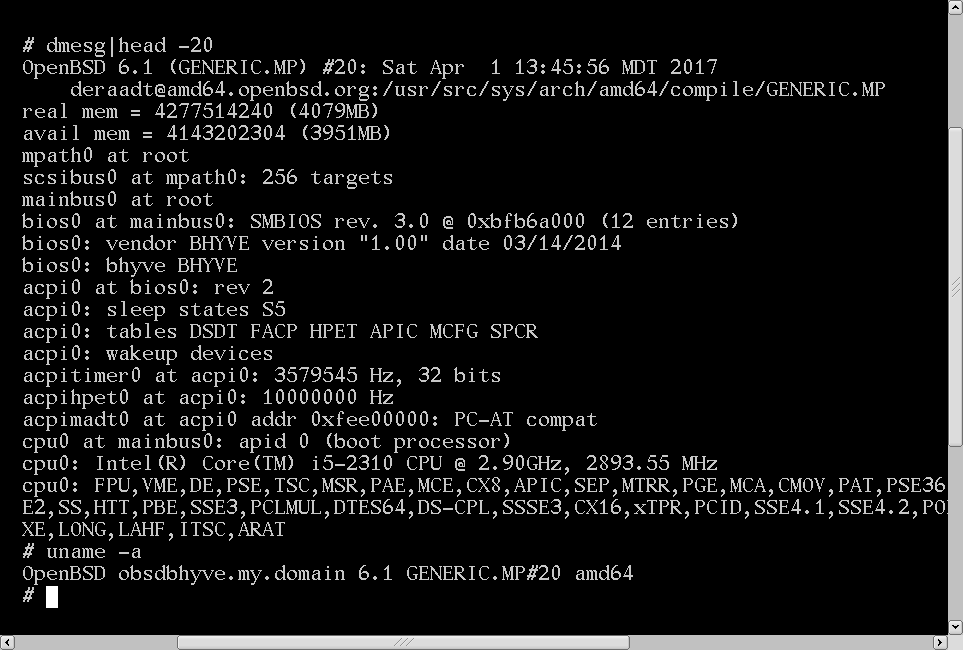
Domain openbsd61 started  

Now you should be able to connect to the guest via VNC or via SSH.

PS My sample xml uses the autoport feature that will be available only in libvirt 3.7.0. If you're using an earlier version, specify the VNC port explicitly:

<graphics type='vnc' port='5904'>

Saturday, April 1, 2017

Update on libvirt bhyve driver: UEFI support

New libvirt version 3.2.0 will be released really soon (maybe even before I publish this post), and I'm happy to announce that it brings UEFI support for the bhyve driver.

Specifically, starting with this version it's possible:

  • Point domains to the UEFI boot ROM to boot UEFI guests (instead of using grub-bhyve(1) for example)
  • Connect to guests through VNC (e.g. using vncviewer from net/tigervnc)
  • Use an USB tablet input device

I've updated the official documentation with description of these features and an example, scroll to Example config (Linux UEFI guest, VNC, tablet).

Gotchas: as you might now, bhyve's fbuf device accepts the vga option (e.g. vga=off etc), and different guest OSes might require different settings to make things work. It's not possible to change this using libvirt right now, so the default value (which is vga=io) is used, hence some guests will not work.

Kudos to Fabian Freyer for doing the majority of that work as a part of GSoC 2016.

Sunday, December 4, 2016

Building libvirt from git on macOS

Update 1 (Dec 20th, 2016): a patched version of Apple's rpcgen was committed to homebrew, please use this one instead. Proper command for it is:

./configure ac_cv_path_RPCGEN=$(brew --prefix rpcgen)/bin/rpcgen ...

Update 2 (Dec 21th, 2016): now it's possible to install libvirt's current git version using homebrew (thanks to Justin Clift!) with:

brew install --HEAD libvirt

Considering all that, this blog post doesn't make much sense anymore, just keeping that for sake of history.


Libvirt is available on macOS via homebrew, however, building a git version (rather than from a release tarball) might be a little tricky.

Recently, I've fixed some minor issues concerning building on macOS, so here is a little guide on building that on macOS.

The first thing needed is a relatively fresh rpcgen, as the one that comes with macOS is too old. I've created a homebrew formula for rpcgen from FreeBSD, you can grab it here: https://gist.github.com/novel/0d74cdbc7b71f60640a42b52c9cc1459 and install it. Please consult homebrew docs if you're not sure how to do that.

Now it's just a matter to point it to the proper rpcgen and build it as usual:

$ ./configure ac_cv_path_RPCGEN=/usr/local/bin/bsdrpcgen --without-sasl
$ make
$ make check

There are some tests failing, need to figure out why, but at least test suite is working.

PS The --without-sasl flag is not really necessary, it's just me being lazy to find out why it failed to find proper headers/libs for me at that time.

Wednesday, February 3, 2016

ZFS on Linux support in libvirt

Some time ago I wrote about ZFS storage driver for libvirt. At that time it worked on FreeBSD only because ZFS on Linux had some minor limitations, mainly some command line arguments for generating machine-readable output.

As of version 0.6.4 ZFS on Linux actually supports all we need. And I pushed the libvirt related changes today.

It will be available in 1.3.2, but if you're interested, you're welcome to play around with that right now checking out libvirt from git.

Again, most of the usage details are available in my older post. Also, feel free to poke me either on twitter or through email novel@freebds.org (note the intentional typo). It could take some time to get a reply though.

Sunday, June 7, 2015

OpenStack on FreeBSD/Xen Proof of Concept

In my previos post I described how to run libvirt/libxl on the FreeBSD Xen dom0 host. Today we're going a little further and run OpenStack on top of that.

Screenshot showing the Ubuntu guest running on OpenStack on the FreeBSD host.

Setup Details

I'm running a slightly modified OpenStack stable/kilo version. Everything is deployed on two hosts: controller and compute.

Controller

Controller host is running FreeBSD -CURRENT. It has the following components:

  • MySQL 5.5
  • RabbitMQ 3.5
  • glance
  • keystone through apache httpd 2.4 w/ mod_wsgi

Everything here is installed through FreeBSD ports (except glance and keystone) and don't require any modifications.

For glance I wrote rc.d to have a convenient ways to start it:

(18:19) novel@kloomba:~ %> sudo service glance-api status
glance_api is running as pid 792.
(18:19) novel@kloomba:~ %> sudo service glance-registry status
glance_registry is running as pid 796.
(18:19) novel@kloomba:~ %>

Compute

Compute node is running the following:

  • libvirt from the git repo
  • nova-compute
  • nova-scheduler
  • nova-conductor
  • nova-network

This hosts is running FreeBSD -CURRENT as well. I also wrote some rc.d scripts for nova services except nova-network and nova-compute because I start it by hand and want to see logs right on the screen.

Nova-network is running in the FlatDHCP mode. For Nova I had to implement a FreeBSD version of the linux_net.LinuxNetInterfaceDriver that's responsible for bridge creation and plugging devices into it. It doesn't support vlans at this point though.

Additionally, I have implemented NoopFirewallManager to be used instead linux_net.IptablesManager and modified nova to allow to specify firewall driver to use.

Few more things I modified is fixing network.l3.NullL3 class mismatching interface and modified virt.libvirt to use the 'phy' driver for disks in libvirt domains XML.

And of course I had to disable a few things in nova.conf that obviously not work on FreeBSD.

I hope to put everything together and upload the code on github and create some wiki page documenting the deployment. It's definitely worth to note that things are very very far from being stable. There are some traces here and there, VMs sometimes fail to start, xenlight for some reason could start failing at VMs startup etc etc etc. So if you're looking at it as a production tool, you should definitely forget about it, at this point it's just a thing to hack on.

Tuesday, June 2, 2015

libvirt/libxl on FreeBSD

Few months ago FreeBSD Xen dom0 support was announced. There's even a guide available how to run it: http://wiki.xen.org/wiki/FreeBSD_Dom0.

I will not duplicate stuff described in that document, just suggest that if you're going to try it, it'd probably be better to use the port emulators/xen instead of compiling stuff manually from the git repo.. I'll just share some bits that probably could save some of your time.

X11 and Xen dom0

I wasn't able to make X11 work under dom0. When I startx with the x11/nvidia-driver enabled in xorg.conf, kernel panics. I tried to use an integrated Intel Haswell video, but it's not supported by x11-drivers/xf86-video-intel. It works with x11-driver/xf86-video-vesa, however, the vesa driver causes system lock up on shutdown that triggers fsck every time on the next boot and it's very annoying. Apparently, this behavior is the same even when not under Xen. I decided to stop wasting my time on trying to fix it and just started using it in a headless mode.

IOMMU

You should really not ignore the IOMMU requirement and check if your CPU supports that. If you boot Xen kernel and you don't have IOMMU support, it will fail to boot and you'll have to perform some boot loader tricks to disable Xen to boot your system (i.e. do unload xen and unset xen_kernel). Just google up your CPU name, e.g. 'i5-4690' and follow the link to ark.intel.com. Make sure that it lists VT-d as supported under the 'Advanced Technologies' section. Also, make sure it's enabled in BIOS as well.

UEFI

At the time of writing (May / June 2015), Xen doesn't work with the UEFI loader.

xl cannot allocate memory

You most likely will have to modify your /etc/login.conf to set memorylocked=unlimited for your login class, otherwise the xl tool will fail with some 'cannot allocate memory' error.

libvirt

It's very good that Xen provides the libxl toolkit. It should have been installed when you installed the emulators/xen port as a dependency. The actual port that installs it is sysutils/xen-tools. As the libvirt Xen driver supports libxl, there's not so much work required to make it work on FreeBSD. I made only a minor change to disable some Linux specific /proc checks inside libvirt to make it work on FreeBSD and pushed that to the 'master' branch of libvirt today.

If you want to test it, you'd need to checkout libvirt source code using git:

git clone git://libvirt.org/libvirt.git

and then run ./bootstrap. It will inform if it needs something that's not installed.

For my libxl test setup I configure libvirt this way:

./configure --without-polkit --with-libxl --without-xen --without-vmware --without-esx --without-bhyve CC=gcc48 CFLAGS=-I/usr/local/include LIBS=-L/usr/local/lib

The only really important part here is the '--with-libxl', other flags are more or less specific to my setup. After configure just run gmake and it should build fine. Now you can install everything and run the libvirtd daemon.

If everything went fine, you should be able to connect to it using:

virsh -c "xen://"

Now we can define some domains. Let's check these two examples:

The first one is for a simple pre-configured FreeBSD guest image. The second one defines CDROM device and hard disk devices. It's set to boot from CDROM to be able to install Linux. Both domains are configured to attach to the default libvirt network on the virbr0 bridge. Additionally, both domains support VNC.

You could get domain VNC display number using the vncdisplay command in virsh and then connect to a VM with your favorite VNC client.

I've been using this setup for a couple of days and it works fine. However, more testers are welcome, if you're using it and have some issues please drop me an email to novel@`uname -s`.org or poke me on twitter.

Tuesday, August 26, 2014

ZFS support in libvirt

An upcoming release of libvirt, 1.2.8 that should be released early September, will include an initial support of managing ZFS volumes.

That means that it's possible to boot VMs and use ZFS volumes as disks. Additionally, it allows to control volumes using the libvirt API. Currently, supported operations are:

  • list volumes in a pool
  • create and delete volumes
  • upload and download volumes

It's not possible to create and delete pools yet, hope to implement that in the next release.

Defining a pool

Assume we have some pools and want to use one of them in libvirt:

# zpool list
NAME       SIZE  ALLOC   FREE   FRAG  EXPANDSZ    CAP  DEDUP  HEALTH  ALTROOT
filepool  1,98G  56,5K  1,98G     0%         -     0%  1.00x  ONLINE  -
test       186G  7,81G   178G     0%         -     4%  1.00x  ONLINE  -

Let's take filepool and define it with libvirt. This could be done using this virsh command:

virsh # pool-define-as --name zfsfilepool --source-name filepool --type zfs
Pool zfsfilepool defined

virsh #  pool-start zfsfilepool
Pool zfsfilepool started

virsh # pool-info zfsfilepool
Name:           zfsfilepool
UUID:           5d1a33a9-d8b5-43d8-bebe-c585e9450176
State:          running
Persistent:     yes
Autostart:      no
Capacity:       1,98 GiB
Allocation:     56,50 KiB
Available:      1,98 GiB

virsh # 

As you can see, we specify a type of the pool, its source name, such as seen in zpool list output and a name for it in libvirt. We also need to start it using the pool-start command.

Managing volumes

Let's create a couple of volumes in our new pool.

virsh # vol-create-as --pool zfsfilepool --name vol1 --capacity 1G
Vol vol1 created

virsh # vol-create-as --pool zfsfilepool --name vol2 --capacity 700M
Vol vol2 created

virsh # vol-list zfsfilepool
 Name                 Path                                    
------------------------------------------------------------------------------
 vol1                 /dev/zvol/filepool/vol1                 
 vol2                 /dev/zvol/filepool/vol2                 

virsh #

Dropping a volume is also easy:

virsh # vol-delete --pool zfsfilepool vol2
Vol vol2 deleted

Uploading and downloading data

Let's upload an image to our new volume:

virsh # vol-upload --pool zfsfilepool --vol vol1 --file /home/novel/FreeBSD-10.0-RELEASE-amd64-memstick.img 

... and download

virsh # vol-download --pool zfsfilepool --vol vol1 --file /home/novel/zfsfilepool_vol1.img

Note: if you would check e.g. md5 sum of the downloaded files, the result would be different as downloaded file will be of the same size as a volume. However, if you trim zeros, it'll be the same.

$ md5 FreeBSD-10.0-RELEASE-amd64-memstick.img zfsfilepool_vol1.img 
MD5 (FreeBSD-10.0-RELEASE-amd64-memstick.img) = e8e7cbd41b80457957bd7981452ecf5c
MD5 (zfsfilepool_vol1.img) = a77c3b434b01a57ec091826f81ebbb97
$ truncate -r FreeBSD-10.0-RELEASE-amd64-memstick.img zfsfilepool_vol1.img
$  md5 FreeBSD-10.0-RELEASE-amd64-memstick.img zfsfilepool_vol1.img             
MD5 (FreeBSD-10.0-RELEASE-amd64-memstick.img) = e8e7cbd41b80457957bd7981452ecf5c
MD5 (zfsfilepool_vol1.img) = e8e7cbd41b80457957bd7981452ecf5c
$

Booting a VM from volume

Finally got to the most important part. In use a volume as disk device for VM 'devices' section of the domain XML should be updated with something like this:

    <disk type='volume' device='disk'>
      <source pool='zfsfilepool' volume='vol1'/>
      <target dev='vdb' bus='virtio'/>
    </disk>

Few notes

Note #1: this code is just a few weeks old, so quite likely there are some rough edges. Feel free to report problems to novel%freebsd.org if you spot any problems.

Note #2: this code is FreeBSD-only for now. However, it should not be hard to make it work on Linux with zfsonlinux.org. Its developers were kind enough to add some useful missing flags in some of the CLI tools. However, these changes are not available in any released version so far. There are some more minor differences between zfs on Linux and FreeBSD, but that should not be hard to address. I was planning to get to it as soon as a new version of zfs on linux with the necessary flags is available. However, if you are interested in that and ready to help with testing -- feel free to poke me so it could be done sooner.


Sunday, March 30, 2014

Using Jenkins libvirt-slave-plugin with bhyve

I've played with libvirt-slave-plugin today to make it work with libvirt/bhyve and decided to document my steps in case it would be useful for somebody.

libvirt-slave-plugin

Assuming that you already have Jenkins up and running, installation of libvirt-slave-plugin is as follows. As we need a slightly modified version, we need to build it ourselves. I've made a fork which contains a required modification which could be cloned like that:

git clone -b bhyve git@github.com:jenkinsci/libvirt-slave-plugin.git

The only change I made is adding a single line with 'BHYVE' hypervisor type, you could find the pull request here. When that would be merged, this step will be not required.

So, getting back to the build. You'll need maven that could be installed from ports:

cd /usr/ports/devel/maven2 && make install clean

When it's installed, go back to the plugin we cloned and do:

mvn package -DskipTests=true

When done, login to the Jenkins web interface, go to Manage Jenkins -> Manage Plugins -> Advanced -> Upload Pluging. It'll ask to provide a path to the plugin. It would be target/libvirt-slave.hpi in our plugin directory.

After plugin is installed, please follow to Manage Jenkins -> Configure System -> Add new cloud. Then you'll need to specify hypervisor type BHYVE and configure credentials so Jenkins could reach your libvirtd using SSH. There's a handy 'Test Connection' you could use your configuration.

Once done with that, we can go to Manage Jenkins -> Manage Nodes -> New Node and choose 'libvirt' node type. Then you'll need to choose a libvirt domain to use for the node. From now on, node configuration is pretty straightforward, expect, probably an IP address of the slave. To find out an IP address, you'd need to find out its MAC address (just run virsh dumpxml and you'll find it there) and then find the corresponding file in dnsmasq/default.leases file.

Guest Preparation

The only thing guest OS needs is to have jdk installed. I preferred to download a package with java/openjdk7, but I had to configure network first. My VMs use bridged networking on virbr0, so NAT config looks like that in /etc/pf.conf:

ext_if="re0"
int_if="virbr0"

virt_net="192.168.122.0/24"

scrub all

nat on $ext_if from $virt_net to any -> ($ext_if)

Now openjdk could be installed from the guest using:

pkg install java/openjdk7

Finally, find the nodes in node management menu and press 'Launch slave agent' button. It should be ready for the builds now.

PS It might be useful to sync clock on both guest and host systems using ntpdate.

PPS libvirt version should be at least 1.2.2.


Saturday, March 15, 2014

Bhyve in libvirt

I continue my activities on improving libvirt FreeBSD support and I have some good news. Recent libvirt release, 1.2.2, is the first version to include the bhyve support!

Currently it's in its early stage and doesn't support some of the features and doesn't provide good flexibility, it's just a basic stuff at this point. I'll not provide a detailed description and instead will point you to the document: Libvirt: Bhyve driver. You'll find a sample domain XML which covers all the features currently supported by the driver.

TODO list

While there are lots and lots of things to be done, there are some specific ones I'm focusing on:

  • Console support through nmdm(4). This is very important feature for debugging and checking what's going on in the guest.
  • Domains autostart support. There's a patch already kindly provided by David Shane Holden that just needs review and testing.
  • A little more flexible slot ids allocation / device configuration.

Qemu/FreeBSD status

As a side note, I'll give an update what's changed since my previous blog post about qemu libvirt driver on FreeBSD. So, here's what's new:

  • Proper TAP interfaces cleanup
  • CPU affinity configuration support, check http://libvirt.org/formatdomain.html#elementsCPUAllocation for details
  • virsh console should now work if you run it from freebsd host and connect to libvirtd on Linux
  • Node status support (such as virsh nodecpustats, virsh nodememstats)

Some of these are available in already released versions, some are only in git version.


Monday, November 11, 2013

Running Qemu VMs on FreeBSD

I'm slowly working on getting libvirt more functional on FreeBSD and, thanks to help of a lot of other people who did very valuable reviews of my patches and contributed other portability fixes, at this point libvirt on FreeBSD is capable of running Qemu VMs with some limitations. I'll provide a quick howto on doing that and what limitations exist at this point.

Building libvirt

As I'm playing with the codebase, it's more convenient for me to use direct git checkout instead of port. I'll provide an instuction how to build it (port should work as well, but I haven't tested).

Configure command looks this way:

CFLAGS="-I/usr/local/include" LDFLAGS="-L/usr/local/lib" ./configure \
                                           --without-polkit \
                                           --disable-werror

CFLAGS and LDFLAGS are needed to help it find yajl includes and libs. We're disabling polkit because we don't want to waste extra time configuring it and we disable treating warnings as errors because some third party libs' headers could mess things up.

When it configures successfully, it's traditional gmake && gmake install.

Preparing a VM

Nothing special about VM preparation, just create a Qemu VM like you usually do, configure it for you needs and you're almost ready to go.

There are some things recommended to do though:

  • Make virtio stuff available (see vtnet(4), virtio_balloon(4), virtio_blk(4) for details) on your guest
  • Configure network interface to using DHCP by adding this line to /etc/rc.conf: ifconfig_vtnet0="DHCP"

Defining and running a domain

Before running up libvirtd, make sure you have bridge(4) and tap(4) modules loaded or built into kernel.

Then you need to execute libvirtd and then connect to it using virsh:

virsh -c "qemu:///system"
Now, we need to create an XML file with domain definition. Here's the one I use: https://gist.github.com/novel/7399465

You might notice we're using virtio for network device and for the disk drive. You'll have to modify a path to the image location and adjust mem/cpu amount for your needs.

Once you're done with that, execute 'define /path/to/domain.xml' in virsh, and domain with name 'qemu' (unless you changed it) will be created. You can start it using 'start qemu' command in virsh.

To see what's going on, we could use vnc. To figure out what vnc port our VM is available at, we need to execute 'vncdisplay qemu' and it should print something like:

127.0.0.1:0

Now we can connect using vnc client, for example, if you use net/vnc, the proper command will be:

vncviewer 127.0.0.1:0

If everything goes well, you'll get an access to your VM's console.

Run ifconfig to check if there's an IP address on vtnet0 interface:

vtnet0: flags=8843 metric 0 mtu 1500
 options=80028
 ether 52:54:00:ae:4c:37
 inet 192.168.122.117 netmask 0xffffff00 broadcast 192.168.122.255
 media: Ethernet 1000baseT 
 status: active

And on the host you'll have:

  • bridge(4) device virbr0
  • tap(4) device vnet0 which corresponds to our VM and is member of virbr0 bridge

It's possible to connect from guest to host and vice versa. Unfortunately, it's not possible to provide access to the internet for VM without manual configuration. Normally, libvirt should do that, but its bridge driver needs some work to do that on FreeBSD, and that's on my todo list.

Apart from bridge stuff, there are a lot of other limitations on FreeBSD currently, but firewalling for bridge driver and nwfilter are probably the most important now. It's not quite easy to come up with a good way to implement it. For example, one has to choose what firewall package to use, pf and ipfw being the main candidates for that.

I'll cover my thoughts and concerns in a separate post.

Feel free to poke me if you have any questions/thoughts.

Update 25/01/2014: some people have troubles because of the old qemu version. On FreeBSD, please use qemu-devel port, because qemu port is too old.